
Easy Screen Print Guide: DIY Screen Printing vs. Professional Services

Screen print is a millenary printing technique seemingly originating from Polynesia. The screen print first appeared in a recognizable form in China during the Song Dynasty and arrived in Western Europe from Asia sometime in the late 18th century. However, it became popular much later, when silk mesh became more available for trade from the East and a more profitable outlet for the newly discovered medium.
Beginners’ Guide for Screen Printing

In this beginners’ guide for screen printing, we will look at this process from two points of view: the DIY approach, where we will teach you how to screen print a custom tote bags at home and the professional methodology, where we will present you with the secrets of the trade.
We dedicate the next easy screen print guide to all those who want to style their tote bags or clothes (do not forget that T-shirt screen printing is all the rage right now in both personal fashion and corporate marketing). To help you understand better all you need to know about screen printing in the DIY screen printing at home paradigm, let’s watch this video together!
How to Screen Print a Canvas Tote Bag at Home
This easy screen print guide for DIY screen printing tote bag consists of multiple easy-to-follow steps. We will discuss each of them to make things work smoothly for you. Since the winter holidays are close by, DIY screen printing may be the best idea you had regarding personalized Christmas gifts for your friends or family members. It makes a memorable impression the screen-printed tote bag that functions as a gift bag for another thoughtful holiday gift as well.
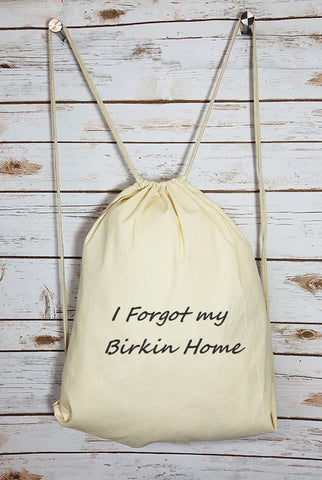
Start by picking a handful of high-quality canvas tote bags and get creative with your designs, or Merry Christmas wishes or fun messages, and other custom-made combinations of drawings and words.
Step 1
Like the video tutorial presents, the first step you need to complete is the creation of a design print onto acetate.
- Printing on an acetate sheet offers you the transparency you need to go on further with your custom screen printing at home.
Supplies:
- A computer, of course;
- A file to print on the acetate sheet – it can be a drawing, a phrase, a logo, or any fun message you want to convey on a canvas tote bag;
- A functional printer;
- Acetate sheets you can buy online or from all big stationery stores.
In short, you need to use the printer to transfer the design onto the acetate sheet. If you ever printed a sheet of paper with words for school or work, this step will not give you any trouble.
- However, if you want your DIY screen printing efforts to yield the best results, our screen printing specialists recommend you set the printer on “photo quality” if your equipment allows.
- Moreover, to save time and prevent errors, make sure you place the coated, rough side of the acetate sheet correctly on your printer tray. The positioning depends on the type of printer you have.
- Get acetate sheets for your type of printer; inkjet printers require inkjet sheets, while laser printers work best with their specific acetate counterparts;
- When you obtain the printed sheet, let it dry for a few minutes; in other words, do not touch it until it is thoroughly
Step 2

This step requires some supplies and some skills, but our easy screen print guide is here to help you with everything you need.
Supplies:
- A screen;
- Emulsion;
- Gloves;
- Scoop coater;
- A stick for stirring.
Let’s make things more explicit here, as you need to understand what you need to get and how to use your supplies.
- In screen printing, when we mention the screen, we refer to a particular screen printing mesh or silk; you can buy such item from online stores or other specialized shops; remember to get the mesh together with a wood/aluminum screen printing frame; usually, supply shops offer both items.
The discussion about screen printing emulsion is long. However, you need to know that the industry – and DIY screen printing aficionados – talk about three main types of emulsion you can use:
- Diazo emulsions (called this way because of their benzene diazonium content) require you to mix by hand the photosensitizer with the resins. They also need more extended exposure to light to cure fully. While they are the most affordable option, Diazo emulsions do not work great for very refined details on prints.
- SBQ-based emulsions (containing Styryl Basolium Quaternary) require no mixing, as the ingredients come together in the jar/tube. When you expose them to light, they cure in a matter of seconds. They are an excellent choice for detailed prints, and you can add multiple coats and layers to create a thicker stencil. In comparison to Diazo emulsions, they sit at the opposite end of the price scale – being the most expensive.
- Dual-cure emulsions (comprising of both Diazo and SBQ) require mixing, while their curing time falls somewhat in the middle between Diazo’s time and SBQ’s time. Such emulsions are affordable and create a thicker stencil you can use for detailed work.
You noticed we spoke about exposure to light a lot and it is time to explain to you how emulsions work. When UV light makes contact with the emulsion on your screen, the emulsion hardens and becomes one with the screen.
- As you noticed from the video above, you will also need a scoop coater, a tool that allows you to apply the emulsion properly onto the screen; you can buy it from online retailers or specialized shops selling DIY screen printing at home supplies.
Method
They say a picture is worth a thousand words, and in this case, the video above is self-explanatory. Nevertheless, in case you do not want to miss any detail, here are the main points to remember during this step:
- Make sure you mix the emulsion well if you bought a variety requiring manual stirring; use the stick and make sure you wear the gloves at all times; many use plastic household gloves, but if you want to preserve your sense of touch at its maximum potential, we also recommend you try surgical gloves from the pharmacy;
- Fill the scoop coater with emulsion using a spoon; always keep a cloth around to wipe and remove the excess emulsion from the scoop;
- Apply the layer (or layers) of the emulsion smoothly, to cover the screen in only one move; depending on your emulsion and the design you want to print, add another coating of an emulsion according to your needs;
- Just as the video recommends, let the screen dry overnight.
Step 3
Now the time has come for you to “burn” the design onto the screen. Time will vary here as this particular stage depends on the type of emulsion you chose to use. Let’s see what happens during this step!
Supplies
- You need the acetate sheet you printed a day before;
- A clear tape roll;
- A UV exposure unit; you can buy such a piece of equipment from an online retailer, or you can make one by following the American Screen Printing Association’s guide. If you want our personal opinion on the matter, you should buy a unit from a reliable vendor. Albeit fun, the building process of a unit takes time, effort, and money, extending your DIY screen printing tote bag project by weeks if not months. If you are building a business or you only want to screen print your tote bags and your t-shirts, invest in a high-quality UV exposure unit and achieve all your goals with no effort.
Method
- Use the clear tape to hold fast the acetate sheet against the screen;
- Put the ensemble in the UV light exposure unit and let it sit until the emulsion cures and the design burns onto the screen.
Step 4
It is time for some washing!
To reach the desired outcomes in this stage of your custom screen printing endeavor, you also need some supplies:
- A pair of clean gloves (plastic or surgical);
- Goggles;
Method
- Place the screen against the wall on the rim of your bathtub; you may have a separate tub for this process and if you do, use it as you see in the video;
- Set your shower head on a high-pressure position to wash the screen properly;
- Wash until you reveal the design on the screen;
- Let the screen dry; as we said in the video as well, the drying methods vary. If you have the opportunity, use a cabinet or a drying room with filtered air that flows continuously. The flow of filtered air prevents contamination and moisture saturation. Moreover, at the right temperature (not too high), the filtered air will help with drying in a uniform and safe manner.
Step 5

We finally reached the stage in your DIY screen printing adventure where you begin the actual screen printing.
Supplies
- The plain canvas tote bag you want to print;
- Cardboard sheets;
- Packing tape;
- A squeegee;
- Wooden prop;
- Palate knife;
Just as the video guide shows, the transfer of the design onto the tote bag is entirely stress-free, not to mention very fun for a DIY project. Here are some points to remember:
- Apply the ink in an even layer;
- Use the squeegee to obtain the design transfer in a smooth continuous movement and applying equal pressure from one end to the other of the screen.
Step 6
Use heat to fix the design against the canvas tote bag! Use one or two blow driers to set the layout and enjoy your newly DIY screen printed tote bag!
As you can see, while it takes some time and some investments, this beginners’ guide for screen printing is easy to follow, while the entire DIY screen printing at home can turn into a hobby and even business. Speaking about entrepreneurship, however, it is time to look at things from the professional perspective!
Screen Printing in a Professional Studio

In service provision environments, you may know screen printing under other names: serigraphy or silk printing, but you have to realize they all describe the same process. As a printing technique for mass production, screen printing works best for vibrant colors, and most studios perform it in bulk. You will notice that the DIY screen printing at home process does not differ much from the professional environment. Let’s learn how print specialists (ourselves included) can transfer your beautiful graphic designs, mottos and company logos on your tote bags and clothes!
Ink + Screen = Love and Screen Printing

As a technique, screen printing and the name of Andy Warhol go hand in hand in the United States, starting with the 60s. The famous artist made the style popular, and from that point on, the technique caught its wings. Few things have changed since then, however. What did change was the multitude of surfaces and fabrics you can print on nowadays. These types of surfaces come with few limitations. Now, let us delve in the mysteries and intricacies of the screen print process.
1. Get the orders as a vector file
If you have your design, make sure you create a vector file to send to the print shop. As you know, the vector file will always preserve the correct resolution of the image. If you do not have your design, talk to the printing company to help you select a drawing, illustration, text, or combination of words and pictures to add to your tote bag or t-shirt.
2. Send the files to the graphic designer
Once you sent the data to the graphic designer, you start your communication process with the art department. The print shop will send you a visual proof of your design to approve. The mockup shows you the approximate sizing and placement of your print, together with the inks and shirt/tote bags’ colors. The art department will make sure you are happy with the mockup (which reflects the result) and send you the pricing. When you sign on the project, the print shop will begin the screen print with the resizing and separations of colors.
3. Film Printing and Screen Burning
The print shop creates a screen for each of the colors in your design.
- In comparison to your DIY screen printing at home, in a professional studio, the experts can work with more than one color. They will create a screen for each of the colors in your design.
- Nobody says you cannot do it at home as well, but it is far more complicated than working with a single ink.
In the shop, the specialists coat all screens with emulsion – the same photosensitive solution you also used at home – and leave them to dry in the dark room.
- They separate your design digitally into color partings, turning each color of your plan into its complete black image.
- Next, they print the images by inkjet technology onto a clear acetate film (which, in the professional environment goes by the name of kodatrace). The emulsion liquid hardens when exposed to UV light.
- They place the kodatrace featuring the final design onto the large exposure unit, put the coated screen on top of the model, and expose it to light for a specific amount of time – depending on the emulsion variety.
So far, the process does not differ substantially from the beginners guide for screen printing we just presented. The crucial change occurring in the studio lies within the use of professional/industrial equipment and supplies.
- Just as it happens at home, the remaining unhardened emulsion burns into the screen.
- Then, a power washer leaves the shape of each color separation as a stencil in its place.
4. Ink Preparation
One thing that changes the game so to speak in a professional screen printing studio (in comparison with a DIY screen printing at home project) is the ink preparation to obtain the exact colors of the design. As you can imagine, there is a base color and some primary colors. The print shop mixes the colors with care and attention. Let us see the details of the ink preparation method.
The ink bottles differ as follows:
- The base: they use it for every color they use, as it helps all colors stay on the fabric.
- Primary colors: white, violet, yellow.
Some companies can print up to six colors per design.
- The specialists mix the base and primary colors to get the Pantone color codes. It is a laborious process, as even the smallest amount of color can completely change the result (even + - 1 gram can differ the overall outcome) for small amounts of colors on the design.
- For more substantial amounts of color, inks in the mixture can be deviated by 1-2 grams without causing any harms.
- In case you did not know, every bottle of ink costs around $100.
- To add the correct colors, the specialists have to mix the color combination for at least four minutes.
5. The Screens’ Water Rinsing
The specialists carefully rinse the screens with water – the same thing you do, preferably in a basement or small bathroom in the house. The process leaves behind clear mesh to show the imprint of the design. Then they dry the screen and touch it up with the emulsion if needs are and then re-exposed to toughen the additional emulsion.
6. The Registering and Printing Process

Once the print shop has all the colors they need onto the screens, they register the image on press. It means that they line everything up to form the final image. It is the step where they use rubber squeegees to pull the ink through the stencils and onto the fabric.
Each printer must choose the appropriate squeegee durometer to achieve maximum print coverage. If it is too soft, the ink might squish over specific details. If it is too hard, the coverage might be more difficult to maintain. After they print each screen color on the product (shirt, towel, apron, tote bag, etc.), they dry it on the press with a heat flash. This way another color can go down on top of the image without inks blending in one with the other.
7. Product Curation
Once they printed all the colors on the product and they dried, they take the product off the press and send them to a conveyor belt oven. They set the temperature to activate the inks chemically so that they bond permanently to the canvas fibers. This process allows you to clean your canvas tote bag without the water-based print coming off. Some print shops use a laser thermometer gun to make sure the inks are getting up to the correct temperature to cure.
More Things to Know about the Professional Screen Print Process

Before we depart, you should know a few more things about the print screen process. Consider them secrets of the trade and information you need to have before you order your future printed shirts and bags:
- The image on the clear acetate film goes onto the screen through an air vacuum technique.
- Installing colors takes 3 hours approximately. Each of the legs of the machine has its color.
- For better printing of dark colors, professional print shops heat the surface. This way, the colors do not mix.
- In case you did not know, metallic colors are twice more expensive than standard colors are. You should keep this in mind for your future t-shirt screen printing at home or any other DIY screen printing project.
- For non-woven fabrics, the print shop adds some additives. Non-woven products contain the most polyester fabric; this is why print shops need to be much more careful to print such products and pay attention to them, as they are very easy to burn. Take this as a suggestion for your DIY screen printing at home endeavor.
- To wash out the extra colors, the print shops power wash the screens and let them dry in sunlight. You can try this at home as well, but you will get a better job done at home if you use filtered air.
- Canvas tote bags are more expensive than t-shirts and more challenging to print. For this reason, you should consider getting all the supplies you need for a home in case you have big screen printing tote bag plans. Concerning bags’ printing difficulty, the easiest products to print are cotton tote bags, followed by burlap jute bags, with non-woven bags being the most difficult.
- Because jute bags have a plastic interior, they need more attention during the printing process.
Conclusion
We hope you enjoyed our beginners guide for screen printing at home and the details we offered on the professional screen printing process. If you have more questions or you want more information on the topic of easy screen print guide and ideas, feel free to ask us!