How Does Screen Printing Work?

Screen printing is both an art and a science we see all around us. Screen printing is a technique we use to transfer beautiful, bold, vividly colored prints and designs onto a wide variety of fabrics. The beauty and importance of this technique are that the artwork becomes a permanent addition to the item.
Screen printing is not only for T-shirts, although they are the most evident pieces of fashion and apparel you see featuring screen printing. Today, we have gorgeous prints on a wide variety of items, such as cotton tote bags, clothes, caps, pajamas, and any textile you can think of. The advantage of screen prints is that it uses colorfast inks. It means that the colors do not fade and that they stretch together with the material, seeing less wear and tear damage.
Lately, screen printed items became extremely popular when it comes to corporate gifts. For instance, screen-printed drawstring backpacks are all the rage right now regarding workshop/conference participants gifts. Also, you will see the technique on swag, trinkets, and high-end art as well.
Have you ever thought about the process of screen printing? Today, we will offer you a quick guide on the process and reveal some of its mysteries to you!
- Artwork Creation

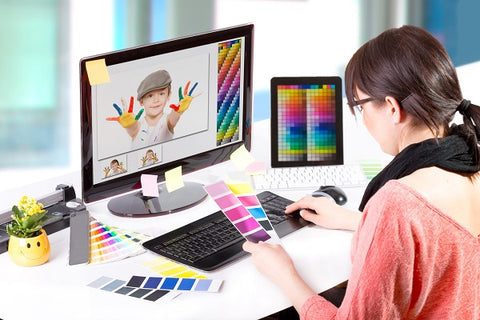
People versed in the visual arts usually use their creations to print on their clothes and shopping bags. If you do not create your artwork, you can look for images and choose some designs that best suit your needs. You have to remember that the print shop needs good image resolution and vector images that they can scale to the correct size and resolution.
If you want to prepare a gift for someone, you can have a conversation with the print shop and let them choose the best artwork, message, or patterns you want to print.
What you have to know is that the screen printing process allows you to use one color – if you want to keep things simple – or an entire rainbow. There are few limits on colors or fabrics, so you can easily print duffle bags, rucksacks, and more.
Nevertheless, some cotton burns faster than other fabric. In fact, you should know that the easiest products to print are cotton items, followed by jute ones, with non-woven bags and items taking the third place.
- The Graphic Designer Steps in

The screen printing studio received your vector image or helped you select the message/print you want them to work. From this moment on, the graphic designer takes over the matters. Here are some of the most important steps you should know:
- You will receive a mockup from the designer. It is a visual demo or proof, showing you how the results will look. You can approve the mockup or ask for future changes regarding sizing, placement of the print on the item, artwork inks, an item’s color. For instance, if you want to print a colorful design on a natural canvas tote bag, the designer will show how the product looks. In case you want high contrasts (yellow print on a black rucksack), you need to pay attention to color saturation, contrast, and so on.
- Once you agree on the mockup, the graphic designer will tell you about pricing and execution deadline. All you have to do is wait.
- Separation of Colors, Film Printing and Screen Burning
The process becomes easier if you print only one color, but if the artwork contains many colors and shades, they need to make a screen for each of them. Here is how things work:
- Back at the printing studio, the team creates a “screen” for each of the colors in your design;
- They coat all the color screens in an emulsion (a photosensitive liquid mixture) and leave the screens to dry; the emulsion hardens when we expose it to light;
- On their computers, they separate your vector image into its colors – this is what they call color separation – and turn each color into its black image;
- They print these images using inkjet technology on kodatrace – this is a clear acetate film;
- The kodatrace featuring the entire design goes on an exposure unit – you can think of it regarding an oversized light box;
- Do you remember the coated screen above? Now the printing studio places the coated screen over the design and exposes it to light; the image on the clear acetate film goes onto the screen through a press vacuum the air technique.
If you do not understand where the “screen burning” stage comes into play, we will clear things as well: the unhardened emulsion is burned into the screen. Then they use a power washer to remove leftovers and leave the shape of each color in the design separated in its place. Think about stencils that are more complex.
- Ink Mixing

Ink preparation and mixing is more difficult than you might imagine. Most professional print shops work with Pantone Matching System to get those exact shades and nuances you want for your T-shirt or tote bag. Mixing inks are difficult and need patience.
Ink bottles are very expensive, and mistakes can delay (and sometimes ruin) the project. Besides the basic color, print studios use ink masters to get all the colors you can imagine. Keep in mind that metallic shades cost more than traditional ones.
As a nice fact to know, sometimes it takes up to three hours to install the colors in the printing press and many more hours to mix them to the desired shade.
- The Great Rinse
Upon checking for the emulsion to have dried on the screen, the printing team starts to rinse the excess emulsion. The power rinse leaves behind the clear screen – mesh – that displays the print of the artwork. The specialists carefully rinse with water the emulsion from the screens. The team lets the mesh dry and uses refined and skilled manual touch-ups with even more emulsion in case the mesh needs more liquid. If the touch-ups are significant, then they leave the mesh to dry once again, so the additional layers of emulsion harden as well.

It is probably the most exciting stage of the screen printing process. If you ever get the chance to witness the entire technique, you should pay attention to this moment, as this is when the magic happens: the actual transfer of colors and images onto your T-shirt, backpack, or cap. This is how it works:
- A press operator aligns the screens and uses a laser alignment tool to load your T-shirt or tote bag. If you print in bulk, the alignment tool ensures that all items receive the same print in the same spot every time.
- Another specialist loads the image on the press – lining all screens, so they form the final image.
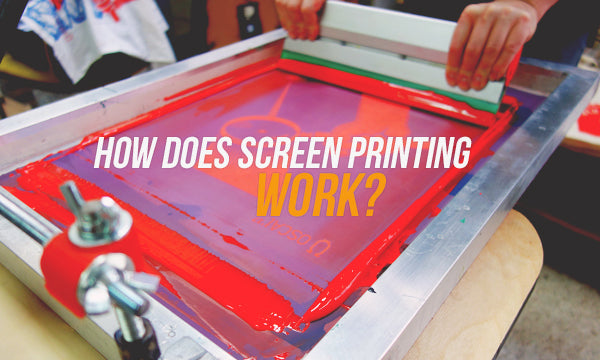
- If you ever heard of squeegees, this is where they step in: the rubber squeegees help the operators pull the ink through the stencils onto the fabric;
- The shirt, bag, or cap goes through all of the screens for the final image to come up; to preserve the quality of color and print in between two screens, each layer of color goes through a flash heat process. It ensures that the next color can go on top of the image without wet ink coming off onto the back of the other screens.
- Curation and Finishing Touches
Now you have a printed shirt – although you do not know this yet. After the item leaves the press, it goes to a conveyor belt oven. Here, high temperatures chemically activate the inks to forever bond with the textile fibers of the item.
Professional print shops have somebody called a “finisher” that inspects the products, makes sure they are perfect and in full compliance with the client’s requests.
Conclusion
Since each design, each ink, color, fabric, and project is unique the screen printing process requires a team of dedicated and disciplined specialists. Such teams beautifully mix the eyes of artists with the skills of engineers, so you get an amazingly printed product to enjoy for years!


